Friday, October 30, 2015

KB Bows & Bowties Halloween Headband Review


A couple weeks ago I entered the KB Bows & Bowties Halloween Giveaway and won! I couldn’t believe I won the giveaway since I’ve been obsessing over their bows and headbands since the shop opened. I can’t believe I finally got my hands on their famous headbands!  I love the shop and all of the creative bows/ headbands that come out of their shop for a reasonable price.

Kami takes pride in what she does and you can tell. The giveaway headband is carefully put together with so much intricate detail. The sequins surrounding each of the “Mickey ears” are subtle, but notable. 


The material of the headband is sturdy so you know that it will be able to withstand multiple uses (even for my rambunctious toddler). The headband itself is very simple, yet pairs with any outfit seamlessly. I, in fact stole it from Haidyn as well to rock it at work today! Can you blame me?


Thank you so much KB Bows & Bowties for the amazing headband . I can’t wait to order more for our trip to Disneyland!  


Check out the business Facebook here and check out the different bows and accessories she has to offer of her Etsy page and IG page.


** This blog post is not a paid promotion by KB Bows and Bowties and is simply a review of the business’ products *** 

Wednesday, October 28, 2015

DIY| No Sew Baby Sushi Costume


I love creating our own Halloween costumes! We started brainstorming on our costume ideas for months before Halloween which helps us get the great deals from every store before Halloween. We love it that much! We save a lot of money in creating our costumes every year and we get to be creative as a family! ( Seriously, can you believe how expensive the costumes are now?)  I know that I only have a couple years until Haidyn doesn't want to be what we chose, but until then I get to have fun!  Last year we dressed up as sushi and soy sauce and it was a huge hit. Here's how I created the cutest baby shrimp nigiri ever and we spent under $20 for all of our costumes. Can you say win? 


MATERIALS 


  • Shrimp template ( you can use this one
  • Iron
  • Felt (orange, cream, black, green, neon green, and light pink)
  • No Sew Glue / Hot-glue gun and hot-glue sticks
  • Scissors
  • Baby bodysuit 


DIRECTIONS
  1. Create your shrimp template. 
  2. Take the orange felt piece and cut our your "shrimp" . Cut out all pieces of the shrimp.
  3. Taking the cream felt piece lay out your shrimp pieces and start to glue them down to create your shrimp. 

  4. Once the glue is dry cut out the excess cream felt to reveal your shrimp and set aside. 
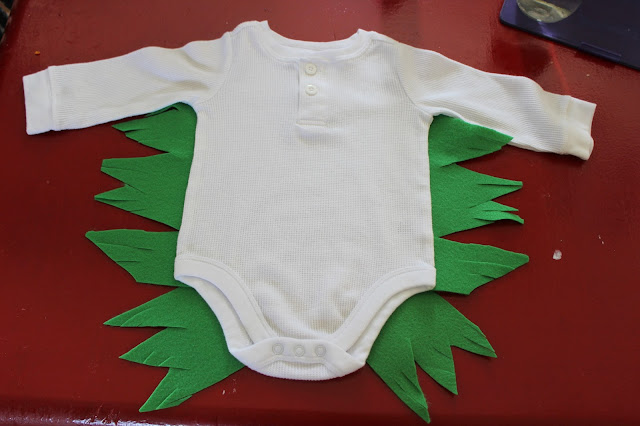
  5. Take the darker green felt piece, fold in half , create your grass bed decoration and cut in half. (This is what the sushi will lay on.) Glue each grass decor to the back side of the body suit and let dry. 


  6.  Once back side is dry flip the body suit around and glue the shrimp on top of the body suit. ( This will take most of the time. Make sure that the shrimp adheres to the bodysuit or everything will fall apart.
  7. While the shrimp dries onto the body suit cut out a black strip from the felt ( to create nori ) and set aside, 
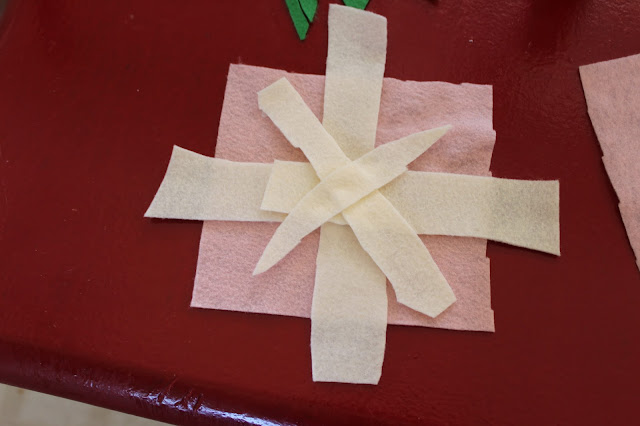
  8. Create your wasabi and ginger by gluing together pieces of green and pink/cream felt. (Get creative with this step, it doesn't have to be perfect.
     
  9. Once shrimp is secure on body suit glue on nori and let dry. 
  10. Once nori is set in place glue on wasbi and ginger pieces and let dry. 


We loved our costumes last year! 


Check out our last Halloween here

Monday, October 26, 2015

DIY | Glow in the Dark Pumpkin


We're counting down the days to Halloween and Haidyn refuses to put down her pumpkin from last year. If you're missing anything it's most likely in her pumpkin. She know carries it around like her life depends on it; which is the cutest thing. This year since we will actually get to trick or treat longer than last year so I decided to spruce up her pumpkin bucket by making it glow in the dark!This DIY was easy and cost me under $3.00! You can do this with any of your Halloween trick or treat bags! If you create your own I'd love to see your recreations!


WHAT YOU NEED

  •   pumpkin bucket 
  •  glow in the dark fabric puffy paint

DIRECTIONS  
  1. Taking your puffy paint create designs all over your pumpkin. 


  2.  Let your puffy paint air dry for at least 24 hrs ( or overnight) . 

Friday, October 23, 2015

Pumpkins, Zombies and Skulls, Oh My!


Halloween/ Fall décor is my absolute favorite. I’m excited that Haidyn is actually appreciating all of the orange in our house. If you didn’t know my favorite color is orange so I get a little crazy, but I can't help it! Haidyn helped me decorate everything and place everything out. (I'm one lucky Mama).  Here are some of our DIY decor around our home for the season. 


Wednesday, October 21, 2015

DIY| Fall Ribbon Garland


Decorations in our home need to be baby proof ( no hard feelings if it gets ruined in 2 seconds by toddler hands) and easy enough to recreate so this year as a family we created our own garland. I've been dying to get my hands on one from Target, but instead I took some inspiration and got creative at home. Everyone helped because it was simple enough to dream to life. It was a great way for all of us to get involved in decorating.


MATERIALS


  • different types of ribbons of your choice 
  • twine ( any type you prefer ours is from Walmart

DIRECTIONS
  1. Cut strips of ribbon. It doesn't have to be perfect, at least I didn't make it perfect because I like that look better.  
  2. Measure out your twine to your liking. (I measured mine to fit our mantle.  )
  3. Pierce the top of the ribbon so that you don't lose length tying it onto the twine. ( If you don't want to pierce it you can tie it onto your twine. ) 

  4. Hang up and admire your work!

Ham & Cheese Hawaiian Sliders


Potlucks are coming up with the holiday season and here is a recipe that is easy to recreate, doesn’t hurt your pocket and you probably already have everything you need at home! When I stumbled across this recipe I knew I had to recreate it for my own work potluck. I set the plate of sliders down and before I knew it all of them were gone! They were a huge hit and I didn’t have to think too much about making everything ahead of time. If your work doesn’t have an oven ( like my work) you can use the microwave to create these sliders. This recipe would be great for unexpected guests!

 
INGREDIENTS

  • 12 Slices of deli honey ham
  • 6 Slices of Swiss cheese
  • 1/2 tablespoon Poppy seeds
  • 1 tablespoon Dijon mustard
  • 1/4 cup Butter melted
  • 1/2 tablespoon Onion Powder
  • 1/2 teaspoon Worcestershire sauce
  • 1 package  KING'S HAWAIIAN Original Hawaiian Sweet Dinner Rolls

DIRECTIONS
  1. Cut entire package of rolls in half.
  2. Place slices of ham and Swiss cheese onto the bottom half of the bread.

  3.  Replace top half of the bread once completed.
  4. In a small container, whisk together poppy seeds, Dijon mustard, melted butter, onion powder.


  5. Cut rolls to create individual sandwiches.
  6.  Pour sauce over the rolls, just covering the tops.
  7. Let rolls sit for 10 minutes.
  8.   Microwave for 30- 60 seconds, checking every 20 seconds or so for a potluck. At home bake at 350 degrees for 10 minutes or until cheese is melted.

  9.  Uncover and cook for additional 2 minutes until tops are slightly browned and crisp.
  10. Serve warm.


>>>>>>Adapted from  King's Hawaiian.<<<<<<